Building a Weather Card with HTML, CSS, and JavaScript
Table Of Contents

Intro
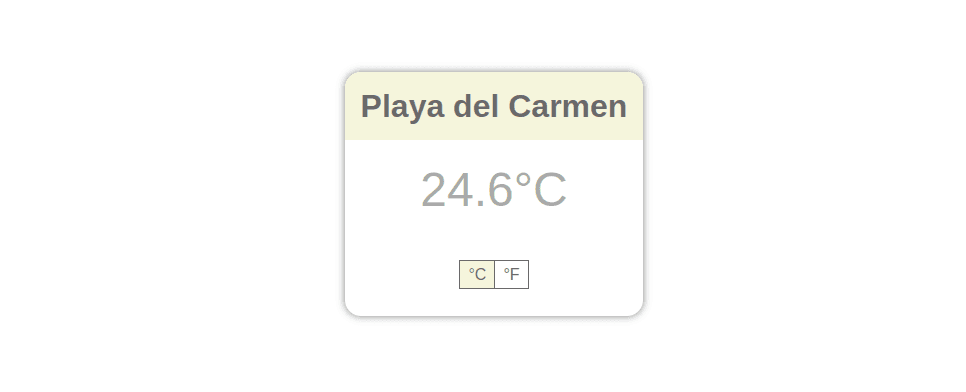
In this tutorial, we will create a weather card that displays the current temperature of a specific city.
The card will also have a toggle button to switch between Celsius and Fahrenheit degrees.
We will build this card using HTML, CSS, and JavaScript, starting with the most basic implementation and gradually increasing the use of libraries and tools in future tutorials.
Design
Our weather card will meet the following criteria:
- It will be centered.
- It will have a city as its header.
- It will display the temperature in large text.
- The card will have a toggle button that switches the temperature between Celsius and Fahrenheit.
HTML
Let’s start with the HTML code:
<!DOCTYPE html>
<html lang="en">
  <head>
    <meta charset="UTF-8" />
    <meta http-equiv="X-UA-Compatible" content="IE=edge" />
    <meta name="viewport" content="width=device-width, initial-scale=1.0" />
    <title>Weather Card</title>
    <link rel="stylesheet" href="styles.css" />
    <!-- link to css file -->
  </head>
  <body>
    <div class="container">
      <!-- flex container that places the card on the center of screen -->
      <div class="card">
        <!-- holds width and style of card -->
        <div class="card-header">
          <!-- holds background color for header -->
          <h1 class="card-title">Playa del Carmen</h1>
        </div>
        <div class="container-temperature">
          <!--sets text style and position for temp -->
          <span id="temp"></span>
          <!-- holds the temp which will be fetched from API -->
        </div>
        <div class="container-toggle-buttons">
          <!-- flex container places buttons in center -->
          <span
            id="celsius-button"
            class="toggle-button right-border-none unit-enabled"
          >
            <!-- Holds  event handler for change of unit-->
            °C </span
          ><span id="fahrenheit-button" class="toggle-button left-border"
            >°F</span
          >
        </div>
      </div>
    </div>
  </body>
  <script src="index.js"></script>
  <!-- link to js file -->
</html>
This code defines the basic structure of our weather card using semantic HTML. We use a div container to center the card on the screen, a card class to style the card, and a card-header class to display the city name. We also create a container-temperature class to style the temperature text and a container-toggle-buttons class to display the toggle buttons.
CSS
body {
  margin: 0;
  box-sizing: border-box;
  font-family: Arial, Helvetica, sans-serif;
}

/* makes card appear in center of screen */
.container {
  height: 100vh;
  display: flex;
  align-items: center;
  justify-content: center;
}

/* min width and styles */
.card {
  min-width: 250px;
  border-radius: 16px;
  box-shadow: 0px 0px 8px 0px grey;
  text-align: center;
}

.card-header {
  background-color: beige;
  text-align: center;
  /* just want rounded corners for top-left, top right to match card's rounded corners */
  border-top-left-radius: inherit;
  border-top-right-radius: inherit;
}

.card-title {
  margin-top: 0;
  padding: 16px;
  color: dimgrey;
}

.container-temperature {
  font-size: 48px;
  margin: 16px;
  color: darkgray;
}

.container-toggle-buttons {
  display: flex;
  justify-content: center;
  padding: 32px;
}

.toggle-button {
  color: dimgray;
  font-weight: 100;
  padding: 4px 8px;
  border: 1px solid dimgray;
  cursor: pointer;
}

.unit-enabled {
  background-color: beige;
  cursor: default;
}

.right-border-none {
  border-right: none;
}

.left-border {
  border-left: 1px solid dimgray;
}
Javascript
Next comes the javascript part which is needed to achieve the following:
- Get the current temperature from a weather API
- Write functionality for the toggle.
Current temperature
To obtain the current temperature, we will be using the (open-meteo)[https://open-meteo.com/] API, which provides hourly weather forecasts for any given location. The API allows us to retrieve the current temperature by passing in the latitude and longitude of the location.
We will use the Fetch API to make a GET request to the open-meteo API endpoint that includes the latitude and longitude values. The API will return a JSON object containing various weather data, including the current temperature, which we will extract and store in a variable. We will then update the HTML to display the temperature in Celsius.
The API endpoint:
https://api.open-meteo.com/v1/forecast?latitude=${lat}&longitude=${lon}&hourly=temperature_2m¤t_weather=true
where ${lat} ${lon} have to be replaced with actual lat and lon values.
So we now have to get the current temperature from the API, and place it in the span with id “temp” inisde our html.
Here is the code:
// Set current temp after calling API
const playaDelCarmenCoords = ["20.63", "-87.08"];
const getTempUrl = (lat, lon) =>
`https://api.open-meteo.com/v1/forecast?latitude=${lat}&longitude=${lon}&hourly=temperature_2m¤t_weather=true`;
let currentCTemp;
fetch(getTempUrl(playaDelCarmenCoords[0], playaDelCarmenCoords[1]))
.then((response) => response.json())
.then((data) => {
currentCTemp = data.current_weather.temperature;
document.getElementById("temp").innerText = `${currentCTemp}°C`;
});
Toggle buttons
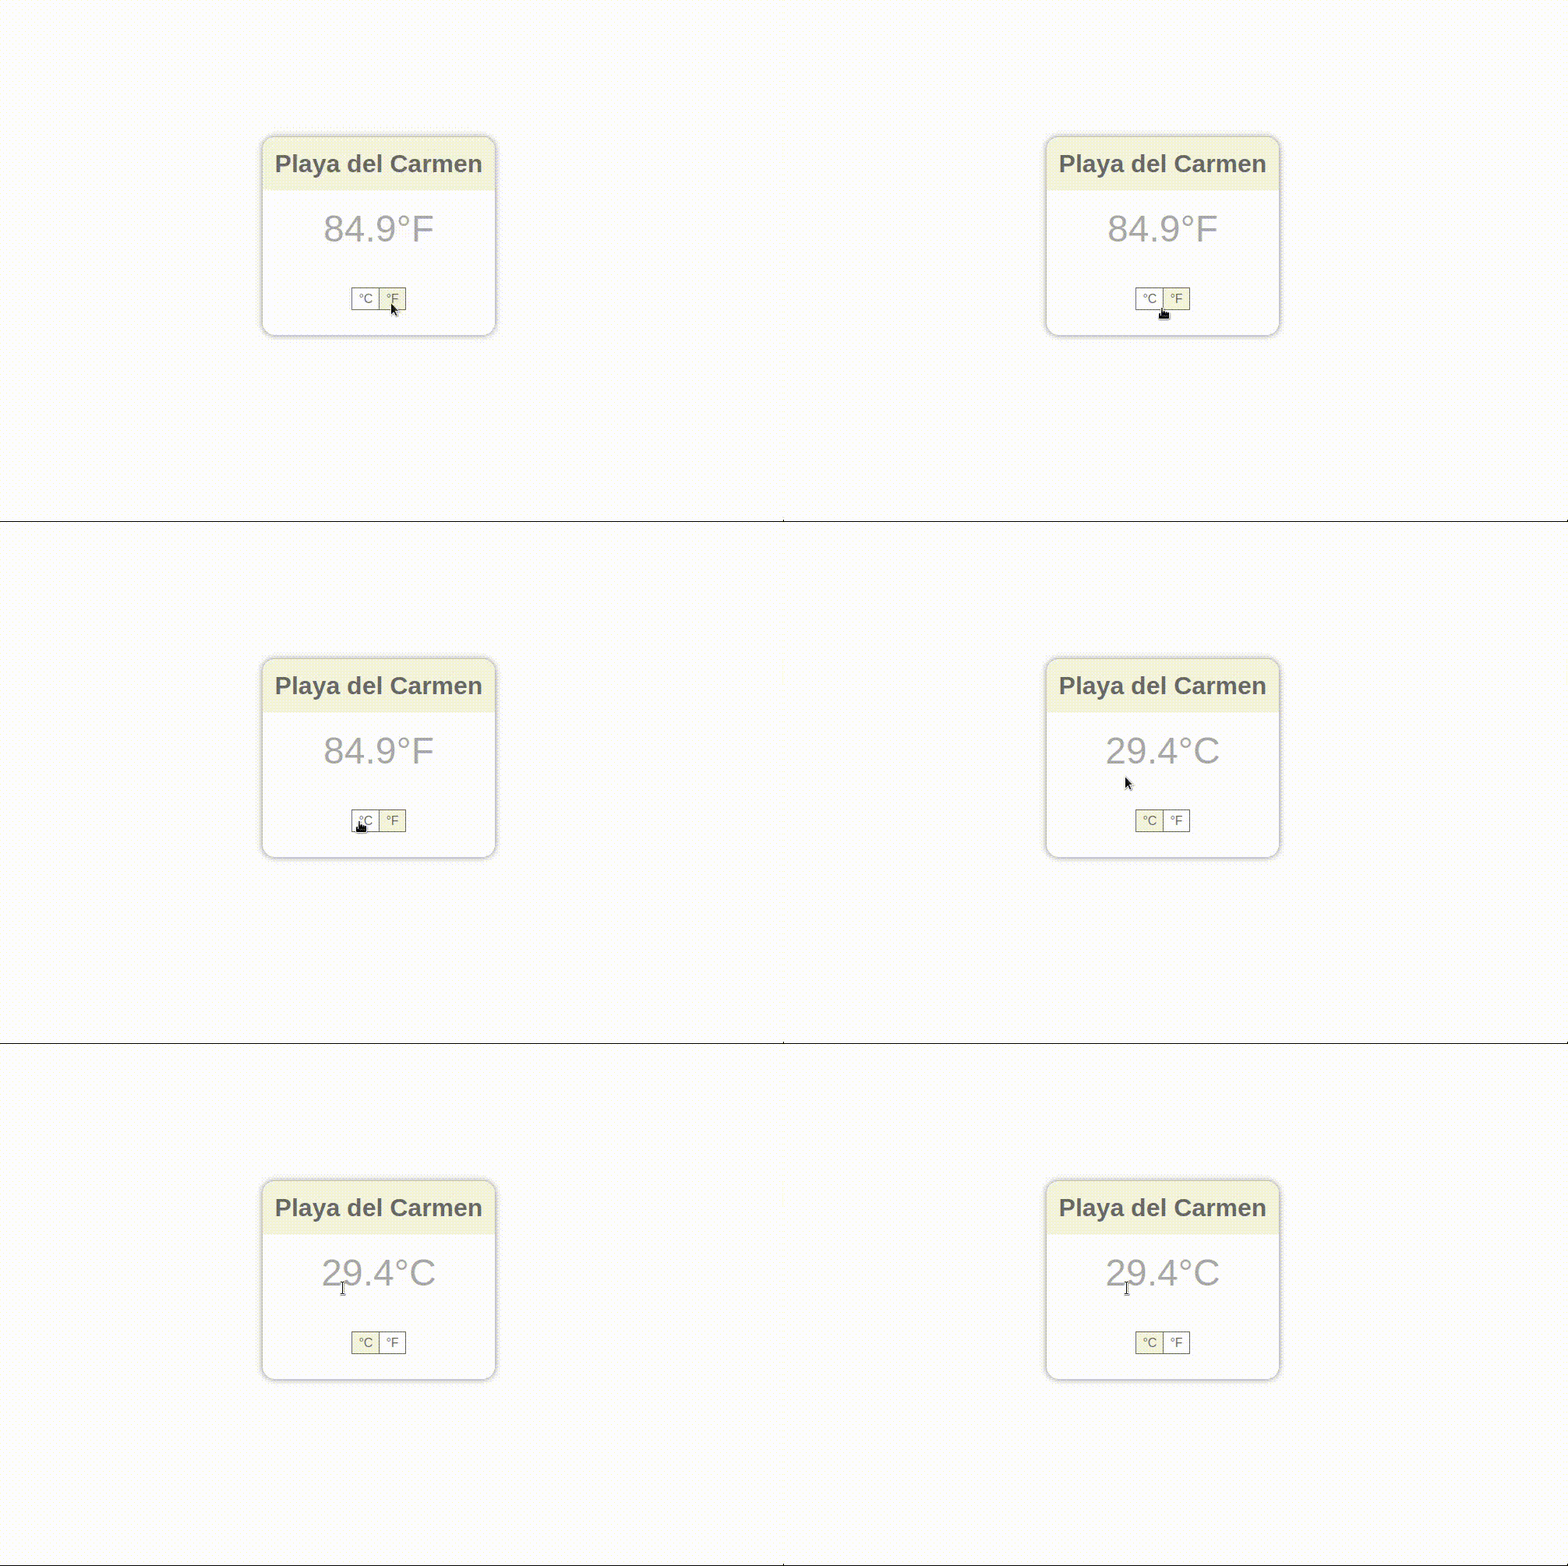
The toggle buttons will allow the user to switch between Celsius and Fahrenheit units for the temperature display. Clicking on a button triggers an event handler function that checks which button was clicked and updates the temperature value and unit accordingly. The enabled unit is highlighted with a different style to indicate which unit is currently active.
To get the toggle buttons to work correctly, we have to do a couple of things:
- Add event listeners to the buttons so that when we click on them, our event handler function is called.
- Write the event handler function which should:
- Do nothing if the enabled unit is clicked.
- Change style of enabled and disabled unit in toggle buttons.
- Change the temp text to relative unit.
Here is the code:
// Add toggle  button functionality

const toggleButtons = document.getElementsByClassName("toggle-button");

for (let i = 0; i < toggleButtons.length; i++) {
  toggleButtons[i].addEventListener("click", handleUnitChange);
}

function handleUnitChange(e) {
  const clickedElement = e.target;
  console.log(clickedElement);

  const hasUnitEnabled = clickedElement.classList.contains("unit-enabled");

  if (hasUnitEnabled) {
    return;
  }

  const clickedId = clickedElement.id;
  let newTempValue = undefined;
  let otherUnit = undefined;

  if (clickedId == "celsius-button") {
    otherUnit = document.getElementById("fahrenheit-button");

    const currentTempValue = document.getElementById("temp").innerText;

    const newTemp = round(
      farToCelcius(currentTempValue.substring(0, currentTempValue.length - 2)),
      1
    );

    newTempValue = `${newTemp}°C`;
  } else if (clickedId == "fahrenheit-button") {
    otherUnit = document.getElementById("celsius-button");
    const currentTempValue = document.getElementById("temp").innerText;

    const newTemp = round(
      celciusToFar(currentTempValue.substring(0, currentTempValue.length - 2)),
      1
    );
    newTempValue = `${newTemp}°F`;
  }

  document.getElementById("temp").innerText = newTempValue;
  clickedElement.classList.add("unit-enabled");
  otherUnit.classList.remove("unit-enabled");
}

const celciusToFar = (cDeg) => {
  return cDeg * 1.8 + 32;
};

const farToCelcius = (fDeg) => {
  return ((fDeg - 32) * 5) / 9;
};

function round(value, precision) {
  var multiplier = Math.pow(10, precision || 0);
  return Math.round(value * multiplier) / multiplier;
}
Here is the final result:

Conclusion
By implementing JavaScript, we were able to retrieve the current temperature from an external API and provide a user-friendly way to switch between temperature units. This is just the beginning of what can be accomplished with JavaScript! Stay tuned for more articles on how to improve and optimize your code.
I hope you learned something useful from this. More articles will follow on how we can refactor this code with more tools that can make our life easier.
Code is here.
Stay tuned! ✌️